Getting a new wet and dry vacuum cleaner ready for its first clean does not need to be complicated. Once the main parts are connected correctly and the machine is checked over, it is ready to handle both liquid spills and dry debris around the home, garage, or workshop. This guide walks through the basic setup process and what to check before switching the unit on.
Understanding the Wet and Dry Vacuum Cleaner
A wet and dry vacuum cleaner is built to collect both liquids and dry mess using the same unit, switching between modes depending on the task at hand. This makes it a practical option for garages, laundries, outdoor areas, and general household cleaning where a single machine needs to handle more than one type of debris. Before diving into setup, it helps to lay out all the parts that came in the box so nothing is missed during assembly.
How to Assemble Wet Dry Vacuum: The Basic Steps
Learning how to assemble wet dry vacuum units correctly from the start makes ongoing use far smoother. While specific steps can vary slightly between models, the general sequence follows a similar pattern across most machines in this category.
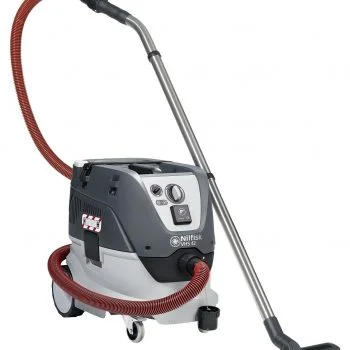
Unpack and check all components: Lay out the motor head, canister or drum, hose, wands, and any attachments before starting. Confirm nothing appears damaged from transport.
Attach the motor head to the drum: The motor unit typically sits on top of the collection drum or tank and locks into place with clips or latches. Make sure these are fully secured so the seal is airtight.
Connect the hose: The hose attaches to the inlet port on the motor head or the front of the unit, depending on design. Push it in firmly until it clicks or feels snug, since a loose hose reduces suction performance.
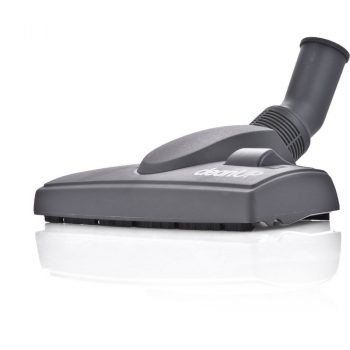
Fit the wand and nozzle: Extension wands and floor nozzles slot onto the end of the hose. Choose the appropriate nozzle or brush attachment based on whether the task is wet pickup, dry debris, or general floor cleaning.
Check the filter is correctly fitted: Most wet and dry vacuums use a specific filter arrangement depending on whether the machine is being used in wet mode or dry mode. Confirming the right filter setup before use helps protect the motor and keeps suction consistent.
Preparing the Vacuum Before Cleaning
Once assembled, a short pre-use check helps avoid interruptions partway through a job.
Confirm the mode matches the task: Many wet and dry vacuums require a different filter or float valve setup for liquid pickup compared to dry debris. Switching between modes without adjusting the filter can affect performance or damage the machine, so it is worth checking this every time the vacuum is used for a different type of job.
Inspect the drum or tank: An empty, clean drum at the start of each session makes it easier to gauge how full the tank is getting during use, particularly with liquids.
Check the power cord and plug: Before switching on, confirm the cord is untangled and the plug is in good condition. This is a simple step that is easy to overlook when eager to start cleaning.
Test suction briefly: A short test run before tackling the main job confirms the hose, wand, and nozzle are all properly connected and that air is not leaking from any loose joints.
Common Questions When Setting Up a Wet and Dry Vacuum
Why does the hose keep coming loose? This usually points to the hose not being pushed all the way into the inlet port. Removing it and reattaching firmly, checking for a click or firm seat, generally resolves the issue.
What happens if the wrong filter is used for wet pickup? Using a dry-only filter with liquids can damage the filter and reduce the machine’s effectiveness. Checking which filter suits which mode before starting a wet job helps avoid this.
Does the drum need to be emptied between wet and dry jobs? Switching from liquid pickup to dry debris in the same session generally calls for emptying and drying the drum first, since mixing wet and dry contents makes cleanup harder and can affect performance.
Bringing It All Together
Assembling and preparing a wet and dry vacuum cleaner is a straightforward process once the parts are laid out and connected in the right order. Taking a few extra minutes to check the hose connection, filter setup, and drum condition before switching the machine on helps the unit perform properly from the very first use.
For those exploring options in this category, the range of wet & dry vacuum cleaners available can be browsed directly on the website, where further details on each model are listed. Anyone with questions about a specific unit, a part, or general setup is welcome to get in touch with the team at Vac City for guidance, or to explore the wider range of vacuum cleaners and accessories available across the site.